|
|
|
Astral Imaging at Dogwood Ridge Observatory |
Latitude: 37°48'51.0" N" |
|
|
|
|
|
|
|||
 |
|
|
|
|
|
|
|
|
|
|||
|
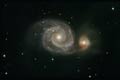
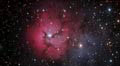
(click on thumbnails to go to that image's page)
|
|||||
| ||||||||||||||||||||||||
|
|
My Typical Processing Flow This is a basic routine that I typically use for processing most of my raw data. I encourage you to check better imagers notes to see what they do as well. The very first step to imaging will be to start gathering the raw data. This assumes that you have focused, settled on a temperature for the camera where the cooling percentage is below 90-95%, and have the guider set up. For most objects imaged through the 10" RC, I will bin the color data 2x2 and take the luminance data at 1x1. Depending on the brightness of the object in the field of view, I will generally take my images at 10 or 15 minute sub-exposures. This gives me an image scale of .82 arc seconds per pixel for the luminance data (Binned 1x1) at f/9 and 1.08 arc seconds per pixel using the AP .67 focal reducer. After the luminance and RGB data is acquired, the first step is to calibrate the images. The data is acquired and calibrated using MaxImDl/CCD. I use "Command Sequence" in MaxImDl using a recorded process of calibrate, remove hot pixels, and remove dead pixels. The calibration frames are acquired either before or after imaging. In my case, I have a library of dark and bias images taken at various temperatures and lengths of time. I usually build these during the nights of clouds and moon. A typical Fall/Winter library will contain brackets of images with temperatures from -30° to -10°. Spring/Summer library will be something like +5° to -5°. The sub exposures will be 10, 15, & 20 minutes. These libraries are generally good for about 3 months. I use ACP and AcquireImages script to run my plan for taking darks and bias frames. Flats are taken using ACP and the Acquire Flats script. This is as nifty as it comes. Arguably, the best flats are sky flats. I tried figuring out the values (times) needed to get proper ADU ranged flats and by time I had the initial value figured and set the camera up the sky had gotten darker and I could only get a few. Now I use the ACP script and after a one time setup for your specific camera that includes the ADU count range acceptable for your flats, you load the appended script, making sure that the camera and mount are connected to ACP using MaxIm and TheSky or StarryNight, and hit run. ACP having gotten the appropriate time and date from the system, knows the flattest section of sky to slew to and when to start taking the flats. When the process starts ACP will take an image and compare it's ADU value to the range that was appended in the script for your model camera. If the image ADU is too high it will wait a minute and try again. Once a successful flat has been taken, ACP saves the image to the path you appointed and adjusts the exposure time and continues to take the assigned number of flats. Usually you append the script to start imaging the flats by listing the filters you are using and listing them from darkest to lightest. This assures that you get the maximum number of flats in the time you have before it gets too dark. On typical runs, I'll get 10 each of L,R,G, & B at both bin 1x1 and 2x2 easily with my USB camera. In MaxImDl, I open all my images and use "Set Calibration" command to load my bias, darks and flat frames. I create masters of the calibration frames and then calibrate the images. At this point I save the calibrated images is a new folder (Cal) always saving the original data in it's original state. The RGB data being binned 2x2, I use MaxImDl to double size the RGB images and save. I then open Registar and align the luminance images with the 2x2 RGB frames. Then these images are saved again in a new folder (Registar). Using the aligned images, I'll open them in MaxImDl and then combine the respective channel. Opening all like images, I set combine for Median or Average and check the bi-cubic resample box. When the dialog opens asking for an align method I choose "none". After the red, green, blue and luminance frames have been combined I make sure I save the result of each and save under a new folder named "Masters". The luminance master is saved with two separate names as one will be IEEE float and the second as a 16 bit FITS. I then close all the images and then open only the master images. I combine the R, G, and B frames under "Color Combine". I use the "Bgd Auto Equalize" and enter my RGB weights as determined using Don Goldman's RGB Calculator program. The resulting RGB image is saved as a 16 bit TIFF. At this point it would be good to read Jim Misti's paper on DDP for enhancing your data. |
| |||||||||||||||||||||||||||||