|
|
|
Astral Imaging at Dogwood Ridge Observatory |
Latitude: 37°48'51.0" N" |
|
|
|
|
|
|
|||
 |
|
|
|
||
|
|
|
|
|||
|
(click on thumbnails to go to that image's page)
|
|||||
| ||||||||||||||||||||||||
|
|
Installation of Foster Systems AstroMC cont
If the roof control is working as expected and the sensors are reading correctly, now would be a good time to mount the system and tidy up the wiring. I used a staple gun that has rounded staples for telephone and thermostat wires. On the heavier extension cord for the roof motor I used nylon cable straps screwed to the walls. Keep the location in mind if you are installing additional accessories such as the AMC-102 Power Controller. This has a three wire lead that connects to the AMC-100 Controller board. Installing the AMC-102 Power Controller Following the manual, installing the power
controller is a simple matter of plugging in the 3-wire lead to the AMC-100
board correctly. As stated in the manual, the Black lead is on the inside next
to the "B" on the board. See the manual for the exact location and orientation.
Plug the power cable into the outlet, check the "Aux. Power" box in the AstroMC
software and that's about it except for hooking up the equipment you want to
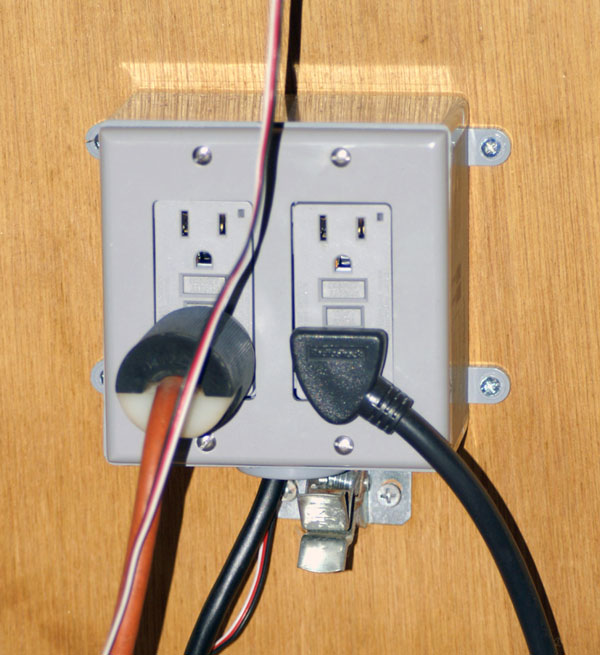
control. This box has two circuits controlled by internal relays. Each duplex
GFI receptacle can be switched independently or together, depending on how you
configure the AstroMC software. For me, I have my power strip that has the power
supplies for the mount, dew controller, rotator, focuser and camera on one GFI
and the other is the roof motor. This gives me a fast way to stop the roof if
something should happen (not yet). They are controlled separately. See
In my case, my Boltwood Cloud Sensor is sending weather information to the AstroMC software from ACP which is configured for weather. This allows both ACP and AstroMC to not allow the roof to open under bad conditions or close if conditions get bad. These are parameters that are configured in the software. ACP can also control the roof via AstroMC software which allows such conditions as opening the roof at a given amount of time before an imaging session to cool down the equipment to ambient temperature and also set the TE cooler on the imaging camera(s). A really neat feature of AstroMC software is the ability to set a wait time should a passing cloud interrupt your imaging session rather than just abort and close. Take time to look over the AstroMC website, read the manual and really see all the possibilities. It is a great system at a great price from some really great people. It is a pleasure to deal with Stan and I think you'll have the same experience. As of this writing (June 22, 2008), the AtPark Sensor has not yet shipped. It is the next addition to my remote capable observatory. Updated as promised on September 26, 2008. I received the new final AtPark sensors and installed. I have one behind the mount and ota and one on the pier looking up at an angle towards the ota. These two reference points give me the signal that the mount is, in this particular case, in the Astro Physics Park 1 position or within at least 4". This is clear of any obstruction that the roof might otherwise have contact with while opening or closing. The AtPark sensor works using ultrasound ranging thus eliminating any IR emission that the CCD camera could "see". The range is 10' and up to 6 AtPark devices can be linked by daisy chaining them with the included 25' 6 conductor telephone type wire. Each unit has a receive and transmit connector. The first connected unit to the main board (AMC-100) would be connect via the 25' wire between XMT and the connection on the AMC-100. The second would be connected via it's XMT to the RCV on the first unit thus daisy chaining them to the AMC-100. Each additional unit would be wired as the second till all are connected. Each sensor emits a signal of approximately 2' in diameter. It measures the m the first significant object (camera, ota, mount) that it reaches. You set the AtPark safe range after all sensors have ranged and are steady. This becomes the reference range for each sensor. Each will be different but kept in the software setup so the system knows when "safe" and "unsafe" conditions exists allowing the roof to be activated or not accordingly.
|
| |||||||||||||||||||||||||||||